Guest Post
Hi, I am Safiya and I am so excited to be your guest blogger on here today....thanks Connie. I blog at Mon Petite Monde, where I share with my readers a little bit about my crafty life, from cooking, quilling or paper filigree sewing although I am still novice in that, and anything crafty I can make with recyclables and easily accessible materials!!
Since the bubble
of Pinterest, the vast ideas you get from there as well as the huge sea of
inspirations that never ceases to bore you, there was one thing that have kept
behind in my head that i need to try it out. What I am gonna share with you
might be not a new but I hope you enjoy it!!
My IKEA lamp had
seen good old days, the rice paper shade was getting old, fading and tearing
up. I needed a solution to make a long shade for it and the yarn and balloon
was the perfect, cheap and best.
I guess I am
blabbering a lot in here so let's get into work, mind you this post might be heavily
loaded with snaps :)
Flour
fabric starch, I
used revive starch, its powder that you mix it with water depending on the
stiffness you need for your cloth
Balloon
Yarn any color
of your choice, I used dual coloured black and white yarn from DAISO Japan
Cling film
First try to
make gluey instance by mixing the flour and starch along with the water, but
not to thick, first time I had used white glue, but I found out using the
mentioned above two makes the final product more sturdier and the
light perfume smell of the starch is much better than the glue smell.
Soak the yarn
into the glue mixture without opening or spreading the yarn out otherwise
you'll end up with tangled yarn, until its totally soaked. You can always use a
hand glove to be on the safe side :)!!
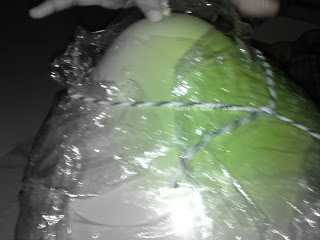
Cover the
balloon with cling film, it will be easier when you pop
the balloon or if you think of deflating the balloon and
using it again, permitted the you didn't knot it too tight, like I did :D!! You
must be wondering what is the orange doing in there? Well, you see my lil princess
want to have the orange as a witness on what we are doing and wanted to capture
it along!!
Tie a little
knot in the beginning and then beginning covering up the balloon with
the yarn in whatever direction or pattern you like. If you like to have a
light intricate design you don't have to take up all the yarn. For more
sturdier and heavy design go for the full.
And there waits the orange and my lil
princess to finish up wrapping the balloon all over with the yarn :)!!
Once you reach
the end tie into a knot and that fix it in its place. Leave it to dry, and I
mean completely dry, as it was winter it really took along time to dry out. If
you pop the balloon before its completely dry your lamp shade might
lose the desired shape.
I let it out in
my flat balcony on my laundry stand, mind you you'll have a mess to clean up
later on :)!!
Once its dried you can pop off the balloon, or like me try to open up the knot of the balloon and see how it deflates away from the yarn. I was wondering if the balloon would fly up and down like usual when the air goes out of it along with the yarn, testing physics in there I guess!
That's all
the work in there, attach it to the cord if you are making a hanging lamp or
just like mine just put it over the lamp stand and turn the lights on!!
I just love
the intricate design that makes up on the wall, it is so
beautiful, don't you love it too!!
Isn't that just
amazing, depending on the size of the balloon you can see the design expanding
on the ball if its a ceiling you'll just have a brilliant to gaze up on there
too!!
Connie here. Isn't this lamp beautiful? I love the patterns on the wall it creates! Thanks Safira for your wonderful tutorial. It was good to have you here today! If you are reading this post anywhere else but at Family Home and Life then it was used without permission! Please report it! Copyright © Family Home and Life 2010-2013 All Rights Reserved


Those would make really fun party lights!
ReplyDeleteWow, I was skeptical at first when I started reading but the finished product is really nice!
ReplyDelete