
I have been so busy that I can’t seem to keep up with all my projects. I had a Saturday with nothing on my schedule and I planned to go into my work room/studio and finally finish some of the projects that had deadlines approaching. My phone rang and a request came from my oldest grand daughter, who is five, to spend some time with me. We haven’t seen each other much since she started school. I love spending time with her, so I said yes and then started thinking of a way to keep her busy, but with me, while I worked on my projects. She loves to sew and wanted to make a stuffed princess doll.
Keep in mind that you don’t need a sewing machine for this project; it can all be done by hand. This is very similar to a project I posted called Sewing Lessons at Gramma's. You can read how I use hoops and make dots for stitches to help my beginning stitchers at Second Sewing Lesson.
First, on my computer, I googled images for Disney princesses coloring pages and she picked out her favorite one, Rapunzel. I saved the image to My Pictures in my computer by right clicking my mouse, then printed the image as an 8x10 picture. (you may not have to do this if you can print a full size image from the site where the image is posted) There are many things you could use, it doesn't have to be a princess. How about a train? Or dinosaur? Or bug?

I taped the picture to the work surface in my studio and placed a piece of white broadcloth fabric cut slightly larger than the sheet of paper over it. I taped the fabric down well on all sides. The outline of the image should be easily seen through the thin fabric.

My grand daughter traced the outline of the image onto the fabric with a pencil. Then she took crayons and colored it in. Yes, my sewing room is a mess; I'm sorry! I didn't have time to clean up for the pictures; it’s how I work when I am over busy. It’s ok, I know what’s going on and where everything is. First things first; I clean up when I have time.

When that was finished, I flipped the Disney princess image over and taped it on a window and traced the outline on the back side of the paper. This will become the back side of the princess doll.

Then it was taped down again and another piece of fabric taped over it. She traced the out line and colored it in keeping in mind that this is her back so there will not be a face but hair over her head. Since it's Rapunzel here, the entire back is hair.
After the coloring was completed, I placed one piece of the fabric at a time on the ironing board with paper under it and paper on top. (using paper keeps the crayon from melting onto the ironing board or iron) I ironed the colored pieces one at a time on a high setting slowly moving my iron over the paper covered fabric. I continued until the crayons were no longer coming off on the paper using clean paper as needed. The ironing does not have to be done but this sets it, keeping it from washing out if the doll is ever laundered. (Some times the crayon will rub off onto other things when the doll is played with! Coloring lightly helps with that)
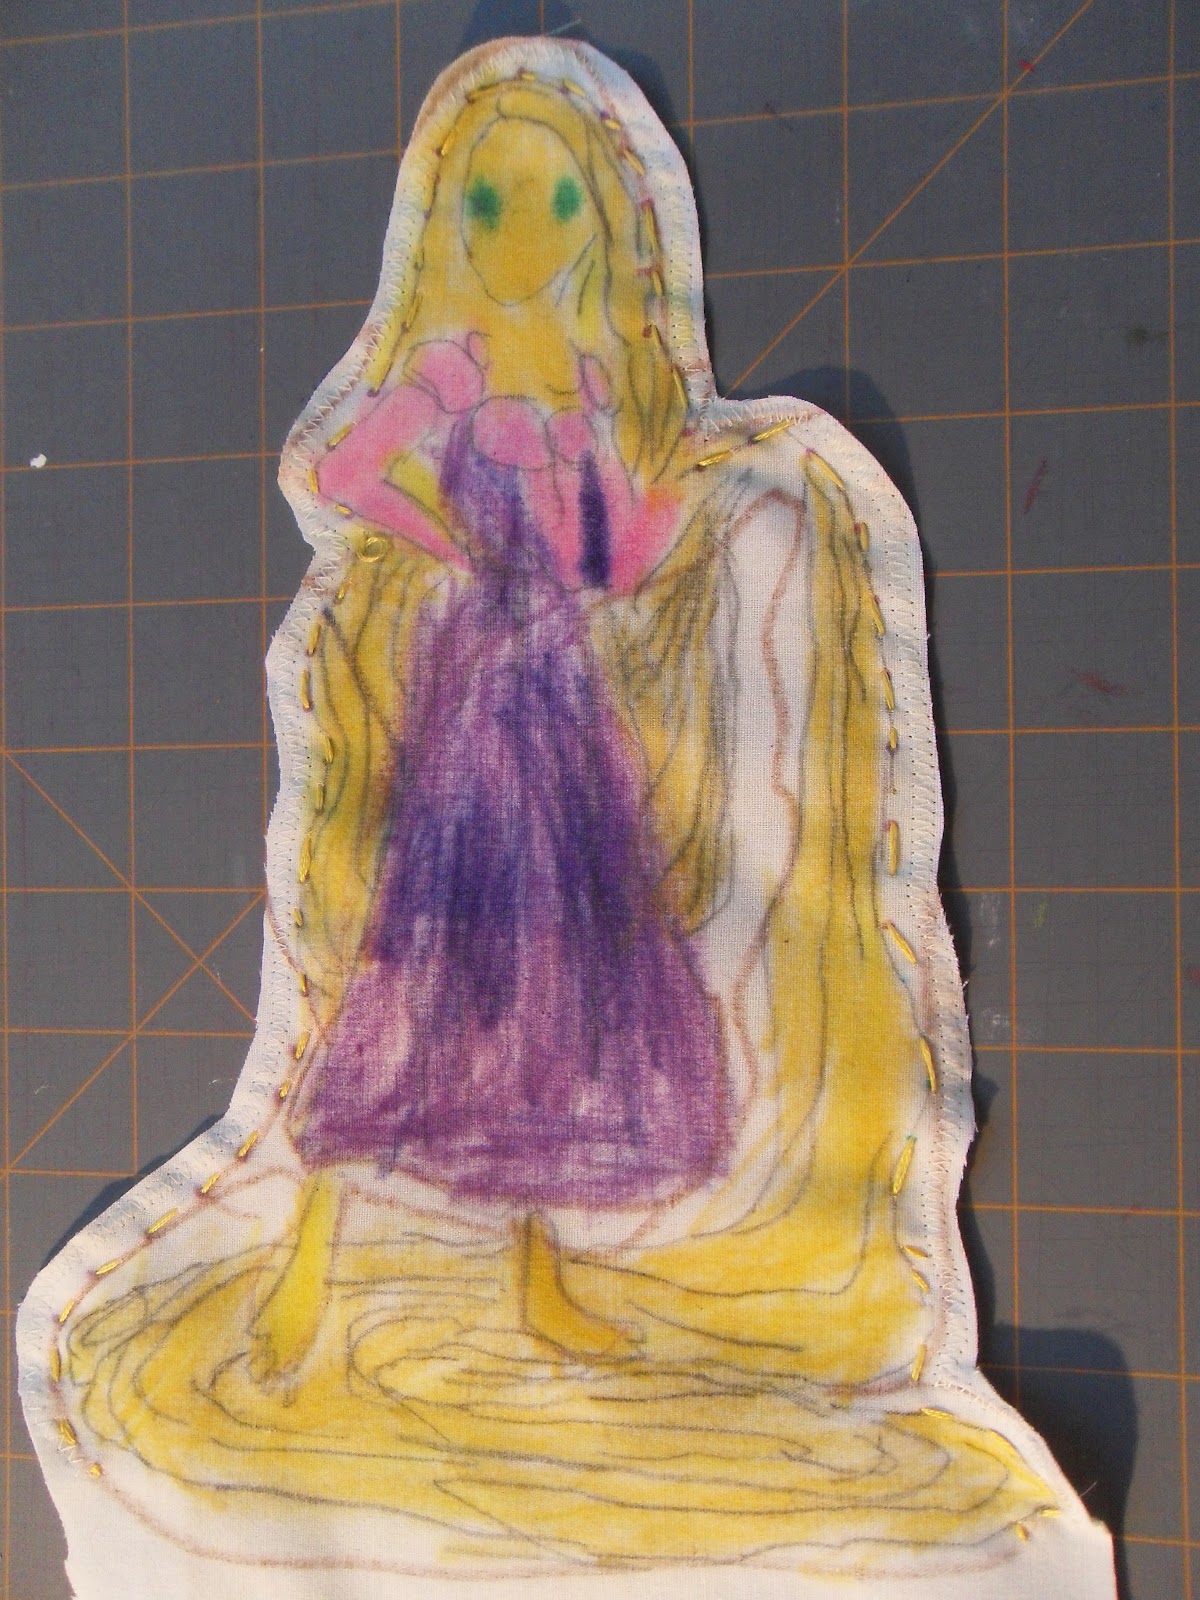
Now place the two pieces of fabric together with the images lined up, right sides out (colored sides), in an embroidery hoop. With a disappearing ink pen I placed dots where she should make her stitches on both sides of the fabric. We used embroidery floss, 2 strands, and she sewed around the outline leaving the bottom open. When she finished, I took it out of the hoop and stitched with a zigzag stitch around it to be sure it would hold. Then I cut away the excess fabric around the doll but left the extra at the bottom opening. She then stuffed it using the eraser end of a pencil to push it into the small areas. I stitched it closed with the zigzag stitch, then cut away the extra fabric at the bottom.

I used permanent markers to go over the pencil line for the face.

Anne is very proud of her doll, has made another one of Cinderella, and hopes to make one of each Disney princess. She is planning to take both dolls to Disneyland next week to show to Rapunzel in person.
*Join me for my link up party, Wow Us Wednesdays.*

Anne is very proud of her doll, has made another one of Cinderella, and hopes to make one of each Disney princess. She is planning to take both dolls to Disneyland next week to show to Rapunzel in person.
*Join me for my link up party, Wow Us Wednesdays.*
Very cute! You are so creative. And what a lucky ducky to get to go to Disneyland! My granddaughter and I visited last summer and had a great time!
ReplyDeleteThis is a great idea and should be right down Sara's alley during some of her summer stays. I appreciate your clear, specific instructions.
ReplyDeleteEvery year, our local Parks and Rec organization hosts a "Princess Party" for little girls. They get to wear their princess garb, and do activities like decorate a crown, make a wand, eat a big crown-shaped cookie, etc.
Thanks Debbie, did you see my post about making a princess wand? (also) a sewing post.
DeleteWhat a great project! She is going to remember this forever, and so are you!
ReplyDeleteYes we both will, we have made Ariel, and Mulan now too.
DeleteGreat idea! I can see doing this with characters from CARS with Bubby. Or maybe just any truck coloring page would do. Thanks for the instructions.
ReplyDelete(PS: You're doing ANOTHER linky starting in June? You are one motivated grandma! Good luck with it!)
Hi Lisa, yes you could do a car or truck or anything with a simple shape. I want to try cars with my boys when they are old enough. Yup, another linky! It will be for crafts, recipes, redos, furniture makeovers, kids activities with grandparents qualify! Thanks for adding my button to your blog. :)
DeleteAmei suas ideias e os trabalhos sugeridos!
ReplyDelete